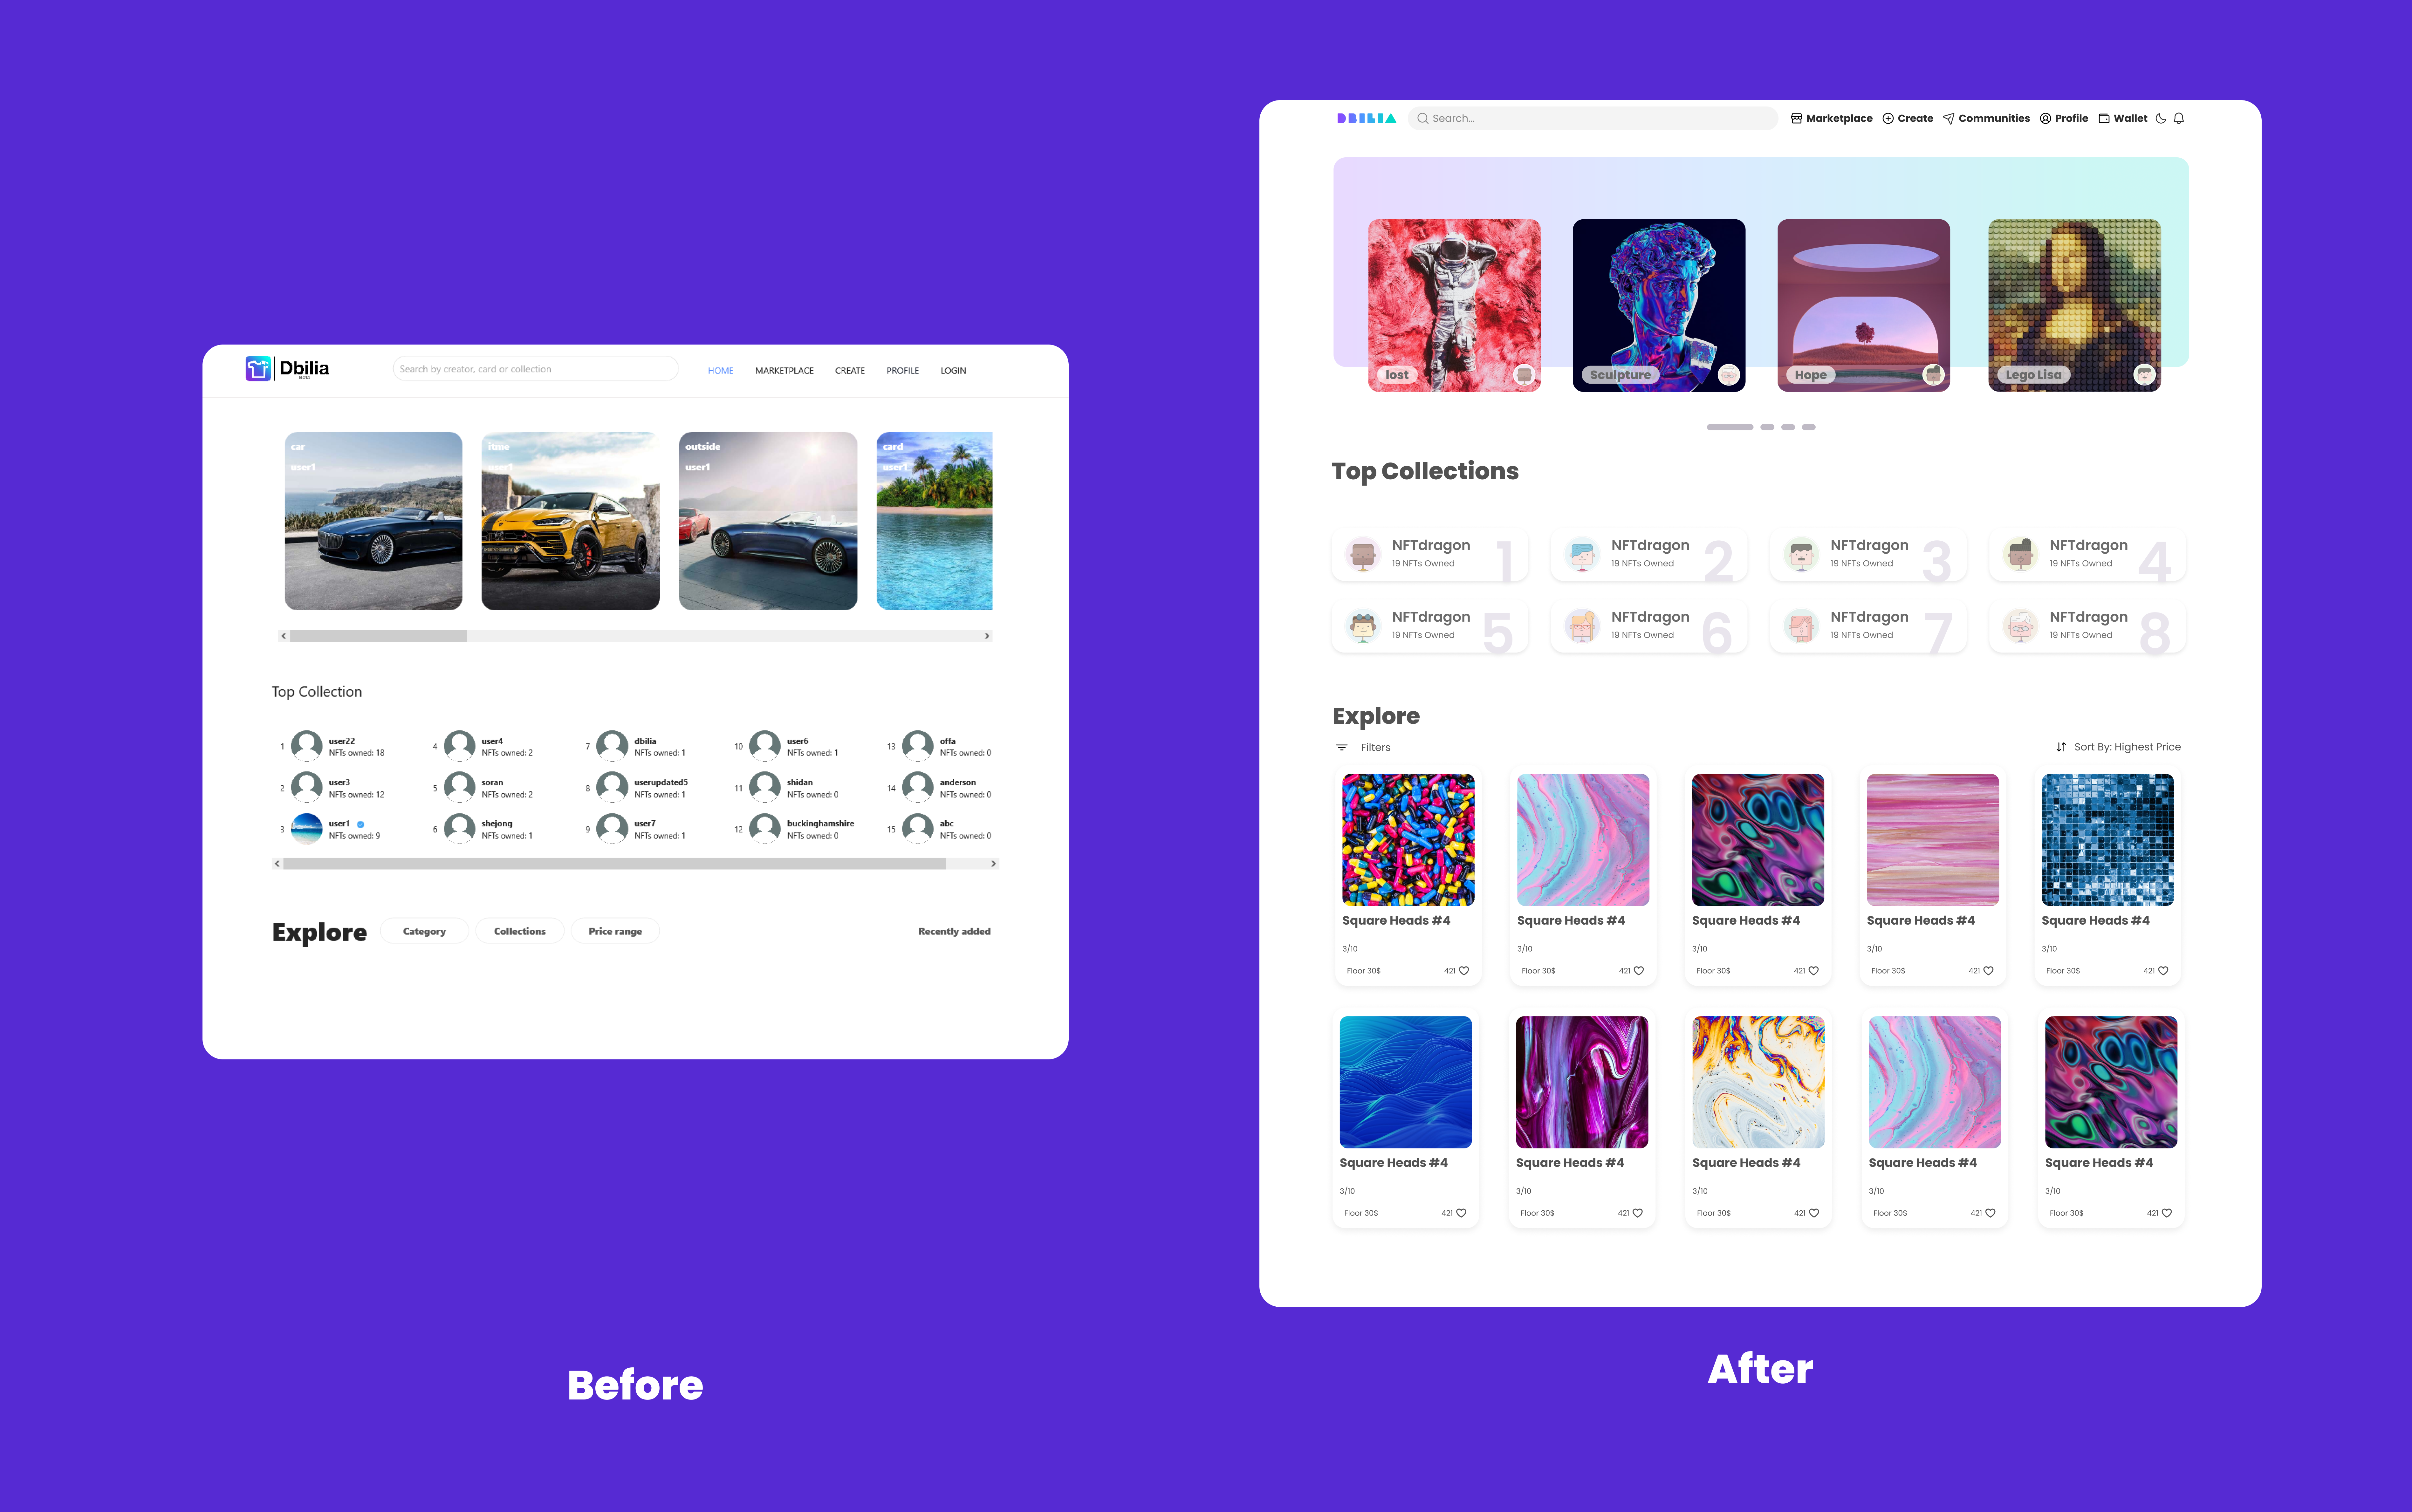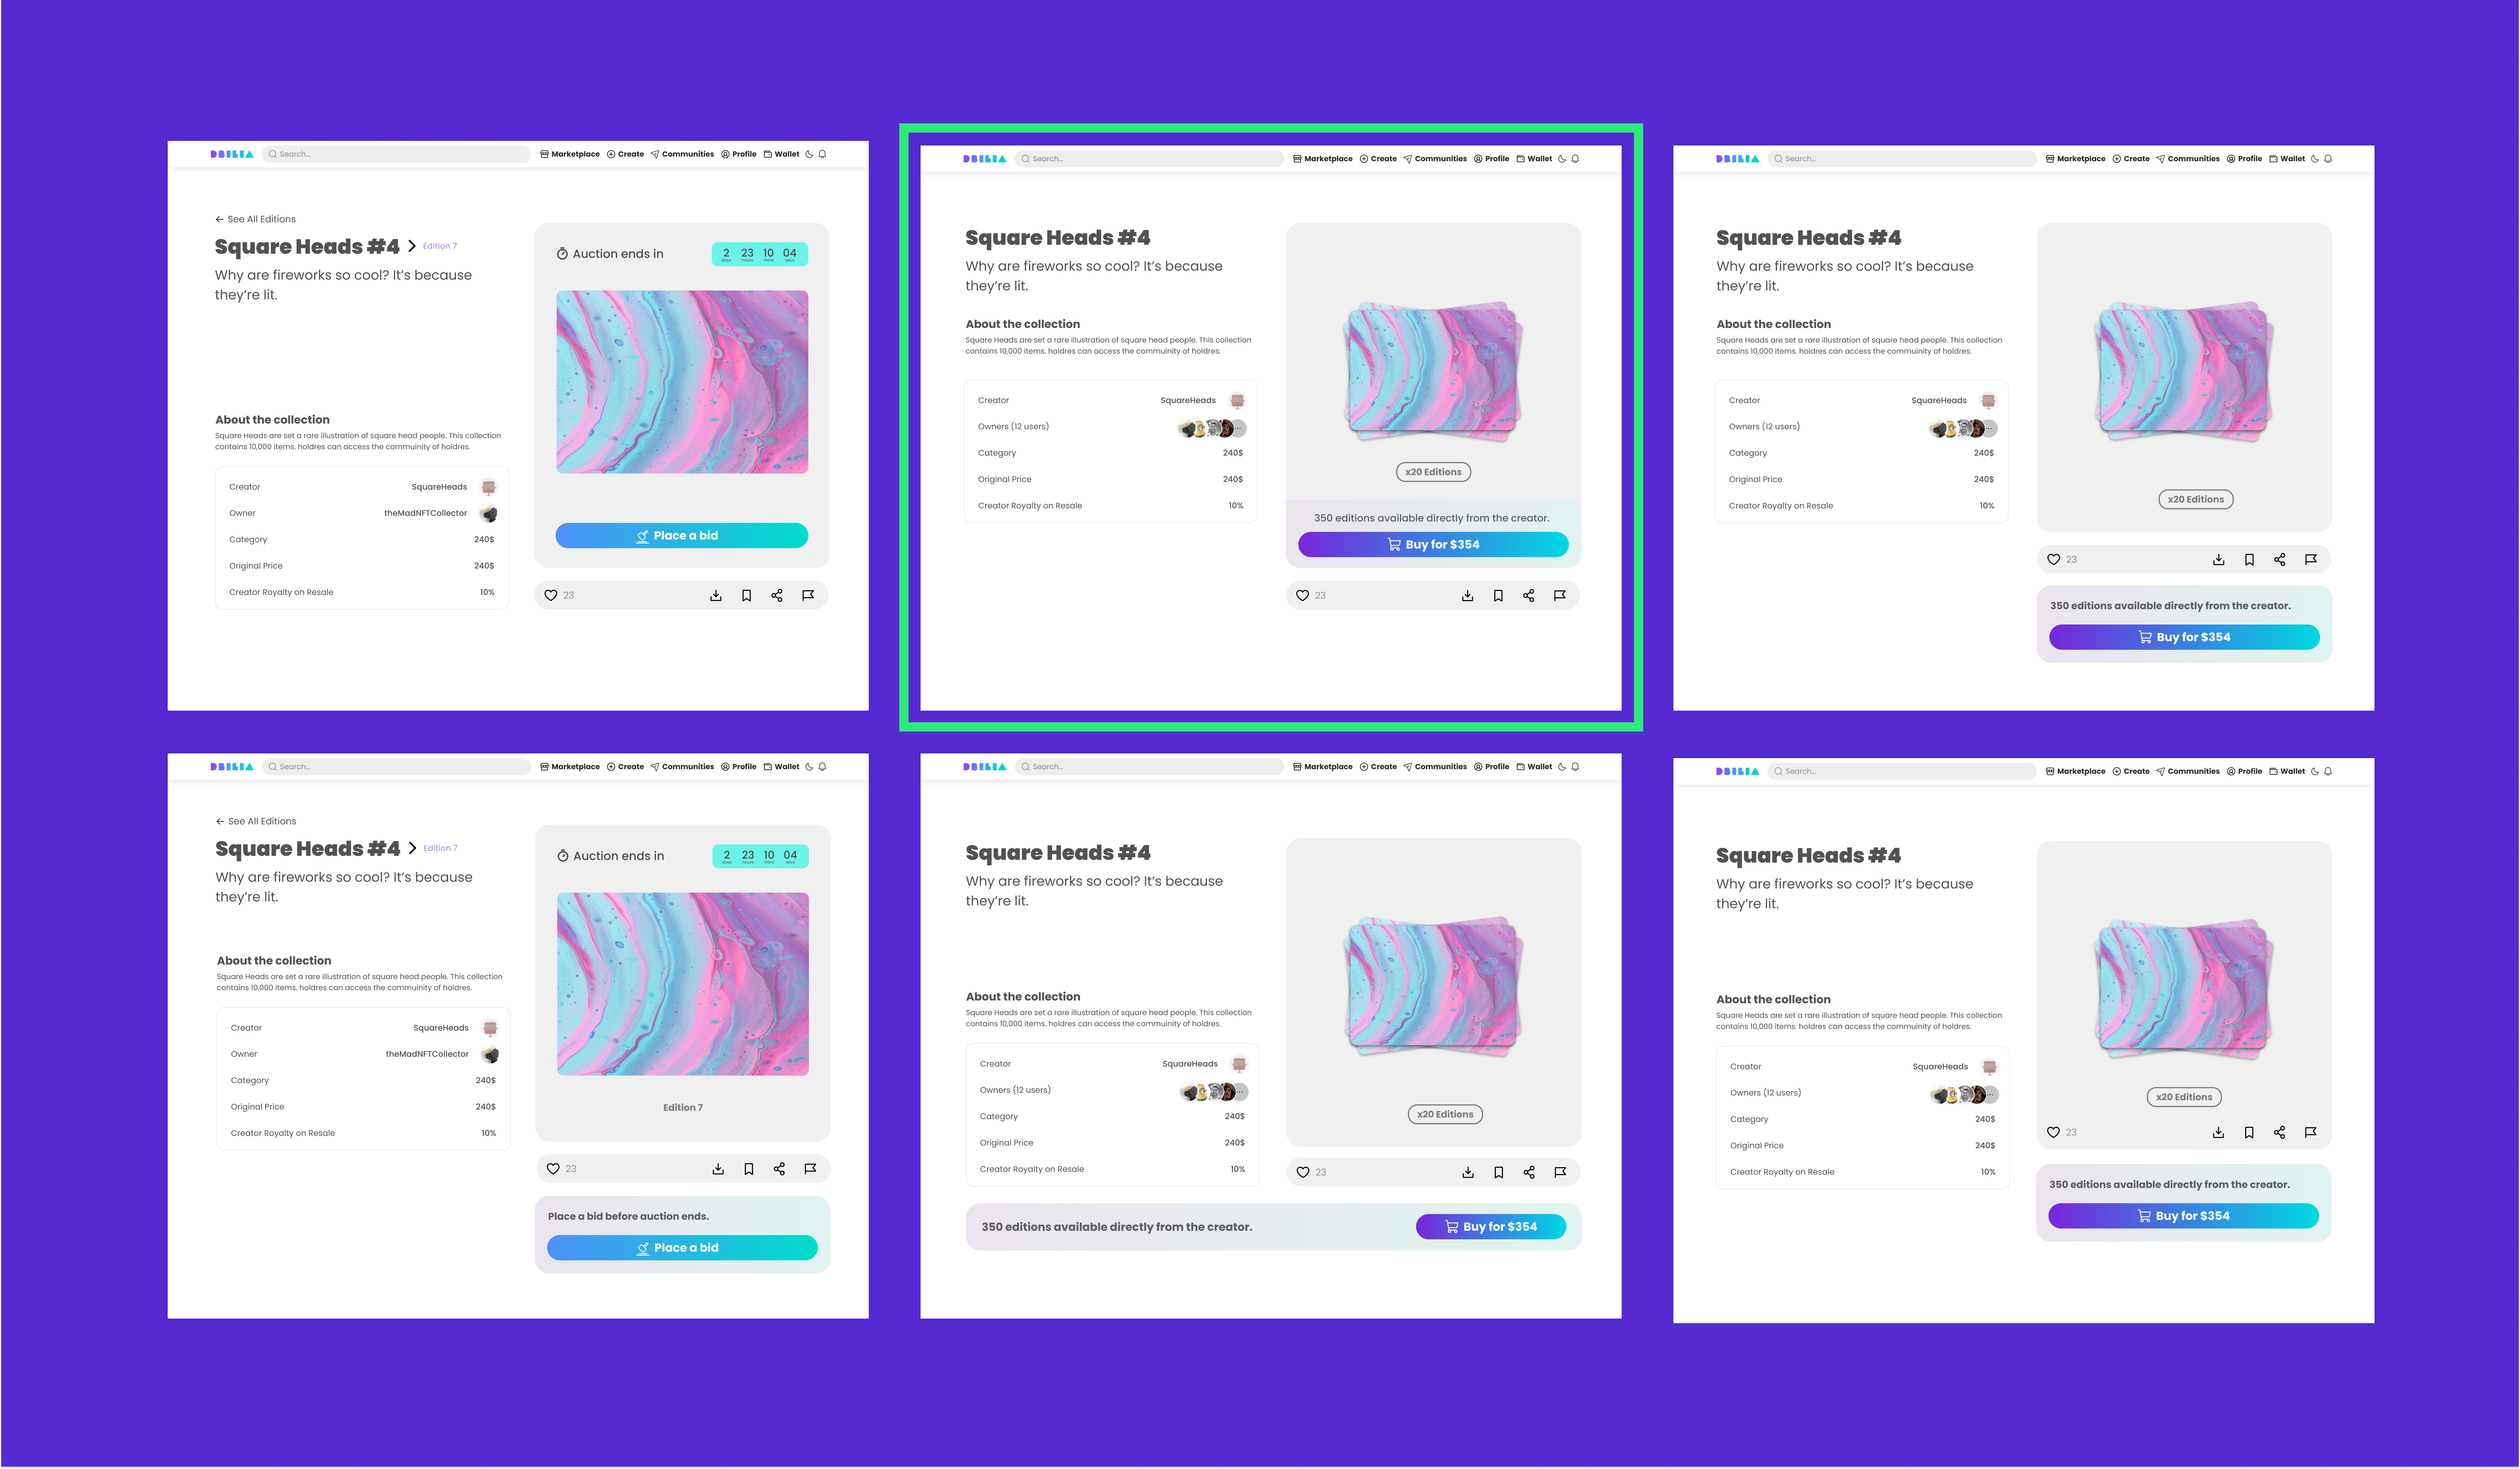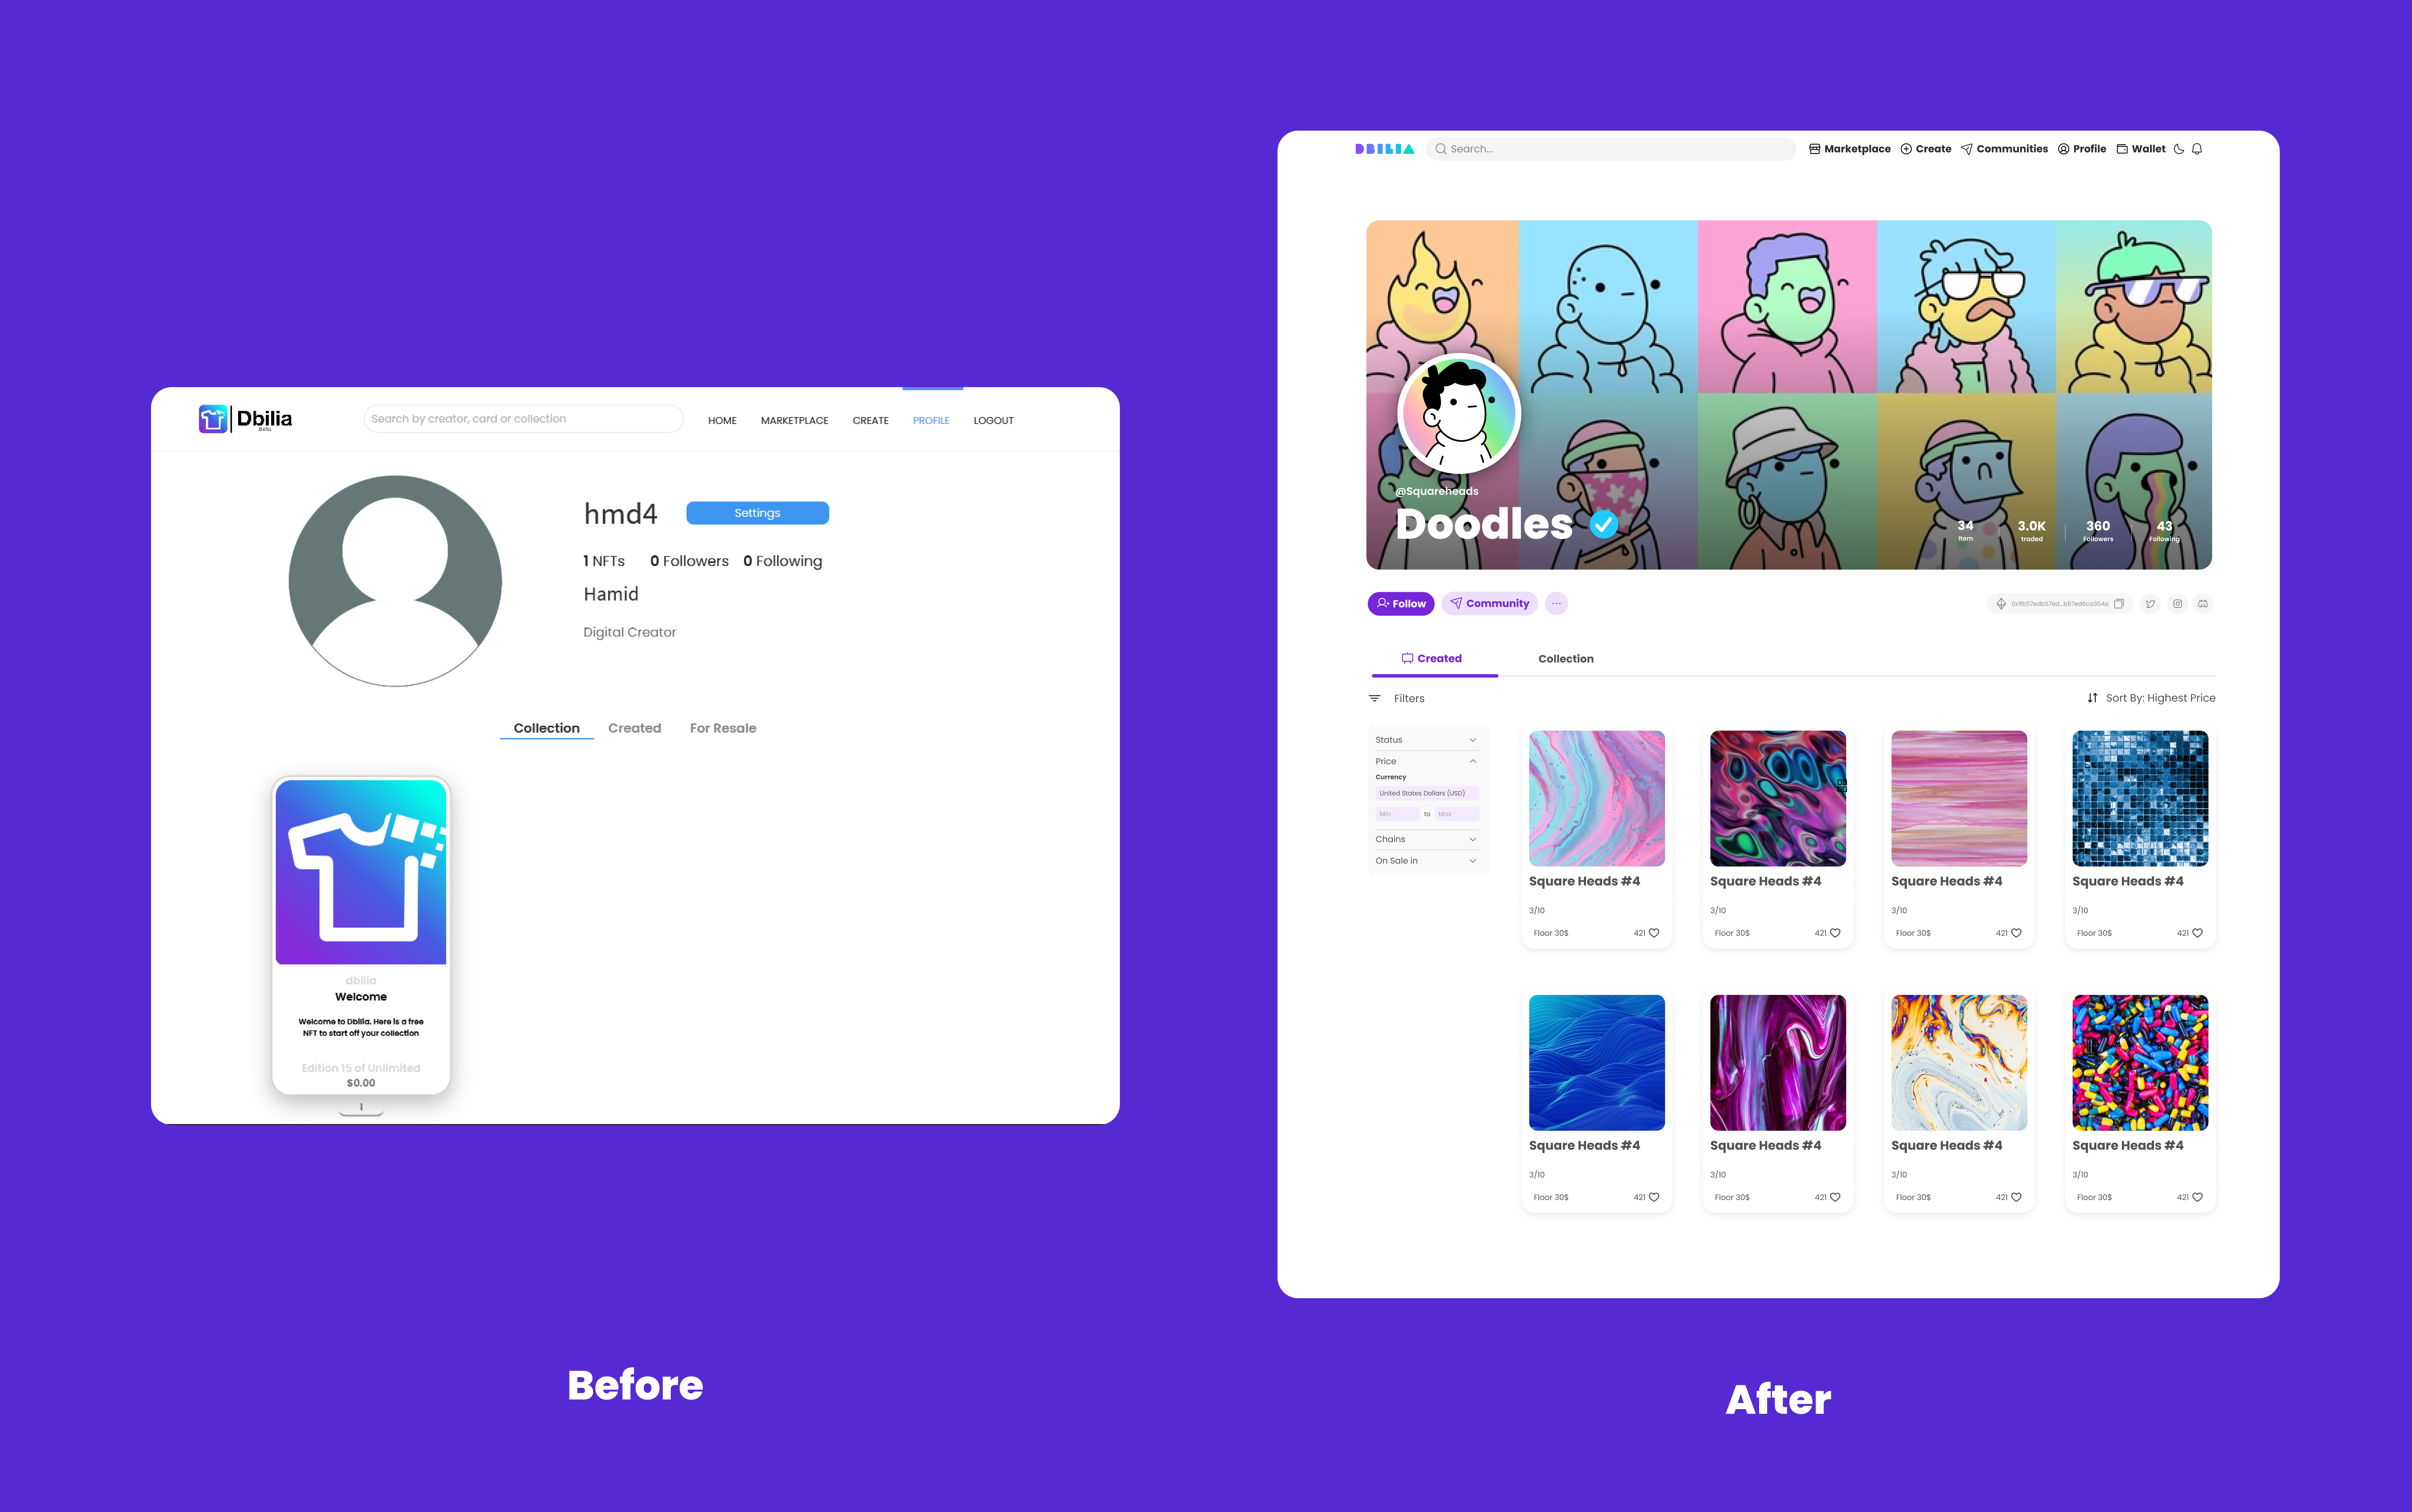
This project was challenging, especially right after graduating from my boot camp. But definitely empowered my refactoring muscles and proved how a well-refactored code base can easily be changed to meet new requirements.
The project was just approved as an MVP when I joined the team. The MVP code was written quickly, which is okay for an MVP. But it definitely needed refactoring to make it maintainable and scalable.
Refactoring
My task was to find any bug or inconsistency in the UI and fix it. I found many bugs listed in the Trello board and started tackling them individually.
After a while, tracking down a simple bug could take a day. So I started refactoring.
My process was like the one below. It was sometimes in a different order, though.
- break big chunks of code into smaller ones. Like, make a section of the page into a component.
- Create components for frequently used elements like buttons, inputs, etc., and replace them with new components.
- Remove all the inline styles and move them to Sass files.
- Remove any JavaScript code that CSS can handle, such as media query hooks, and write the CSS for it.
- CSS Grid was overused in the project in places where flexbox where more appropriate. So I replaced them with flexbox, which was three times less code!
- I replaced Sass Variables with CSS Variables because I could use them in run time, and creating a dark mode was much more manageable.
- I used React-joy-ride to create the tour for the new users. So many coupled lines of code were removed.
- I used Formik helper components to make forms more concise.
A file with +2000 lines of code
For example, there was a file with +2000 lines of code. It was a page where a user could create a new NFT. It consists of a form with many inputs, validation, and a tour for the new users. Plus, the responsiveness was handled by Javascript and was coupled with other logic.
I needed to fix some styling, but the code was not workable!
-
I started to break it into some big chunks with Internal Components.
-
The styles in the project were coming from different sources, such as inline styles, global styles from Sass files, and styles bundled with AndDesing components. So I moved the inline styles into scoped Sass files.
AntDesign components were also problematic cause there was no way safely override the styles. Overriding styles could break the functionality of the components. In addition, antdDesing components were not tree shakable. Importing one small AndDesing component adds the entire AntD library to your application bundle. I kept them for a while but gradually replaced them with my own components.
-
Then removed all the
width > 640 && <>...</>andwidth = useWidth()stuff, and handled the responsiveness with CSS. -
Thing was still very messy. Mostly because of the onboarding tour. The logic for the tour. Unreadblele codes like
onClick={() => if(!tour|| createTour.step !== 5) handleCreateNFT}where everywhere. So, I needed to decouple that. I used React-joy-ride. It removed many lines of code. I just needed to add ids or special class names to different sections of the page, and in a separate file, I defined the steps and messages of each step. -
Finally, I created some custom
<Input />components to encapsulate the validation, error messages, and reuse styles.
The +2000 lines file was now 500 lines of code and workable and scalable.
Decoupling new user tours
I used the JoyRide package to decouple the new user tour from the main code. It allowed me to define the tour steps in a JSON format and bind it to different elements in the page using some custom CSS class names or Ids. We had three different onboarding tours. One of them would run across pages. So, it starts on one page and ends and another page. That didn't work well with the library. So I used the tour in controlled mode, with a Context Provider and useEffects. Later we leveraged the context to add a "reset tours" option in the user's preferences.
Redesigning
Some months into the project, I saw many UI design tasks here and there. The code looked much better at this point, but the UI didn't look good in the browser.
I suggested redesigning the app instead of doing band-aid design fixes. I had to deliver the design in Figma. It was one of my first times trying Figma, but it was much more intuitive than Adobe software, and I never returned to Adobe!

After the design was finished, I started to implement it. And it didn't take long.
The things I changed were: valeus of CSS Variables
styles in the components a walk through each page, changing layouts, and polishing the styles.

Later I added more complex responsiveness. While the tour is still working without a problem. Here is the result:
<video alt="Demonstrating Responsive Design in web page built by me" src="/dbilia/responsive.mp4" controls playsinline autoplay muted class="rd-xl"
And Some Graphic Design
I did some, or maybe a fair amount of Graphic Design. Although, It was not part of my job description, but when my supervisoer apprached me first before he search for a freelance Designer, I liked to do some designing after a while coding. So, we created a bunch cool visuals for DBILIA in diffenrt stages of the project. One I really like is the logo that I redesigned.

Concolusion
This experience proved how refactoring could prepare the basis for agile development. Of course, refactoring takes some time, and it does not have a tangible outcome for users or your supervisor. But the real reward comes afterward when you can quickly add or change features quickly and without tears. Besides, this process strengthened my understanding of how React works under the hood, which came in handy in many projects later.
Visit DBILIA